
The bridge is the hand you place on the table to guide the cue — the one at the front, not the one that strikes. While the grip gives you power and control over the stroke, the bridge determines your accuracy. An unstable bridge causes the cue tip to wobble and strike the cue ball in the wrong spot, no matter how well you do everything else. Let’s look at how to build it properly in all its variations.
The Open Bridge: The Easiest One to Learn
This is the most common bridge and the first one almost every beginner learns.
- Place your palm flat on the table.
- Raise your knuckles slightly without lifting the base of your hand from the cloth.
- Create a groove between your thumb and index finger (some players use the thumb and middle finger instead).
- Rest the cue in that groove, allowing it to slide smoothly back and forth without drifting.
The biggest advantage of the open bridge is that it lets you clearly see where the cue is pointing at all times. With a closed bridge, your own hand partially blocks that view. It also reduces friction when your hands are sweaty or the conditions are humid because the cue slides across the skin instead of rubbing against a closed finger loop. With practice, your thumb and index finger naturally fall into position almost automatically.
Its main weakness is that on powerful shots (long draw shots or the break), it’s harder to prevent the cue from moving sideways inside the groove.
The Closed Bridge: More Control, Steeper Learning Curve
This is the bridge most commonly used in carom billiards and much of competitive pool in the United States.
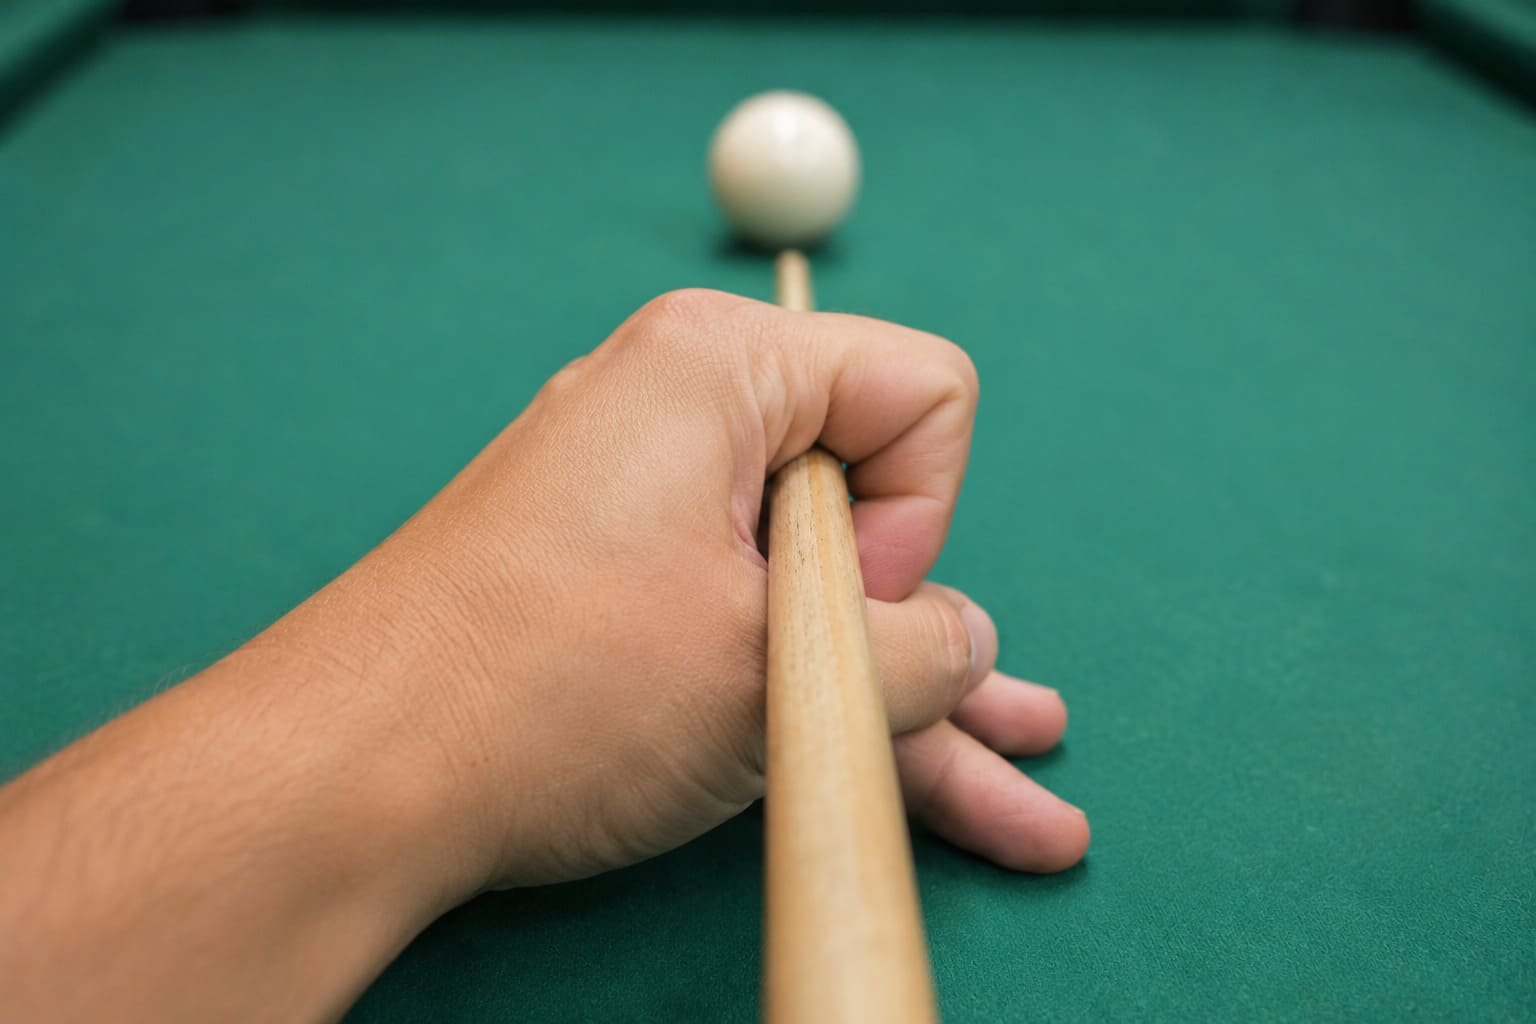
- Rest the base of your hand together with your little, ring, and middle fingers on the table.
- Form a loop around the cue using your thumb and index finger.
- Adjust the loop so it holds the cue without squeezing it. The cue should slide freely without wobbling sideways.
The greatest advantage of the closed bridge is that it locks the cue into its line. When formed correctly, the shaft can barely move sideways, giving you more control on spin shots and long draw shots. The downside is that it takes considerably longer to master because finding a comfortable and effective position requires more practice than the open bridge.
Xavi's Recommendation
The book that helped a son win his very first tournament.
A father bought this book hoping it would help his son improve his pool game just a little. Three weeks later, the boy won his very first tournament. What meant the most to the father wasn't the trophy—it was the look on his son's face when he won.This book doesn't just help you improve your stance or your stroke. It also gives you something meaningful to share with someone you care about—a perfect reason to spend time together around a pool table.
Variations for Specific Situations
Beyond the two basic bridges, there are several variations you’ll need for shots that can’t be played with a flat hand.
Raised open bridge: When another ball blocks the direct path, raise your hand while maintaining the same groove, supporting yourself with fewer fingers. It’s less stable than the flat bridge, so use it only when necessary.
Raised closed bridge: The same concept as the closed bridge, but elevated. Useful for short draw shots where you need extra height while maintaining the stability of the closed loop.
Rail bridge: When the cue ball is close to the rail and you can’t place your whole hand on the cloth, use the rail itself as the support while adjusting your fingers according to the shot angle.
Massé bridge: When raising the cue between 45 and 90 degrees for a massé shot, the bridge changes completely. A highly elevated V-shaped open bridge is typically used, prioritizing stability above everything else since even the slightest movement can drastically alter the curve.
Mechanical bridge (rest, spider, moosehead or violin): When the cue ball is too far away to reach comfortably or other balls block where your hand should go, this tool supports the cue. There’s absolutely no shame in using it. Even professional players use one whenever the shot requires it. Forcing a hand bridge in an awkward position almost always produces worse results than using the correct tool.
The Correct Distance
A widely accepted guideline is to position your bridge approximately 20 cm (8 inches) from the cue ball for a standard shot. If the bridge is too far away, you lose accuracy because the cue has more room to move vertically during the warm-up strokes, making it harder to keep perfectly straight.
The Most Common Bridge Problems
My cue sticks or doesn’t slide smoothly through a closed bridge.
Usually, the loop is too tight. It should hold the cue without choking it. If you feel resistance while sliding the cue before the shot, slightly loosen your thumb and index finger.
My bridge hand shakes.
Tension is the most common cause. A relaxed bridge is much steadier than one where the fingers are pressing hard into the cloth. Also, keep your hand dry, as moisture often causes instability, especially with the open bridge.
My cue ball jumps off the table unintentionally.
This is usually a bridge problem rather than a stroke problem. If your cue isn’t parallel to the cloth—because the bridge is too high or too low—you end up striking downward on the cue ball, causing it to jump. Make sure your cue remains as level as possible before shooting.
I don’t know whether to use an open or closed bridge.
There isn’t one correct answer. It depends on your comfort and the type of shot. As a general rule, the open bridge works best for softer shots with little spin or when the cue ball is tight against the rail. The closed bridge offers greater security for powerful draw shots and shots requiring consistent spin.
Is it wrong to always use the same bridge?
No. Many players strongly prefer one bridge and use it for most shots, switching only when necessary. The important thing isn’t which one you choose, but that it’s stable and consistent every time.
I’m embarrassed to use a mechanical bridge. Is it only for beginners?
Not at all. It’s a legitimate tool used by players of every level, including professionals. Forcing an awkward hand bridge almost always gives worse results than using a mechanical bridge properly.
Frequently Asked Questions
Does the bridge change if I’m left-handed?
No. The process is exactly the same. You simply switch which hand forms the bridge and which hand holds the cue.
How much pressure should my bridge hand apply to the table?
Enough to remain stable throughout the stroke, but without digging your fingers into the cloth. Stability comes from finger position, not brute force.
Why do I sometimes see players using only their fingertips instead of the whole hand?
That’s a variation used when you need slightly more height than a standard flat bridge provides without requiring a fully elevated bridge. It’s common when the cue ball is partially blocked.
Should I practice the bridge separately from the rest of my technique?
Yes. Practicing the bridge by itself—forming it and sliding the cue back and forth several times without hitting the cue ball—helps build muscle memory until it becomes automatic.
You may also be interested in